
Pages and Posts
![]()
How to create schematic layouts to generate html pages.
If you want even more detail, read the MorfLess description and instructions at GitHub.
Pages are created from schematic source files that have the ".page" extension. For example: article-1.page.
The url of the page does not have to be "/article-1/". It can be whatever you decide it to be. The page reference, when using lists or pagination, will be the file name (article-1.page) rather than the url. So it is worthwhile having shorted page source file names when creating post lists or pagination links.
Posts follow the same idea except that the source files have the extension, ".post".
Schematic details
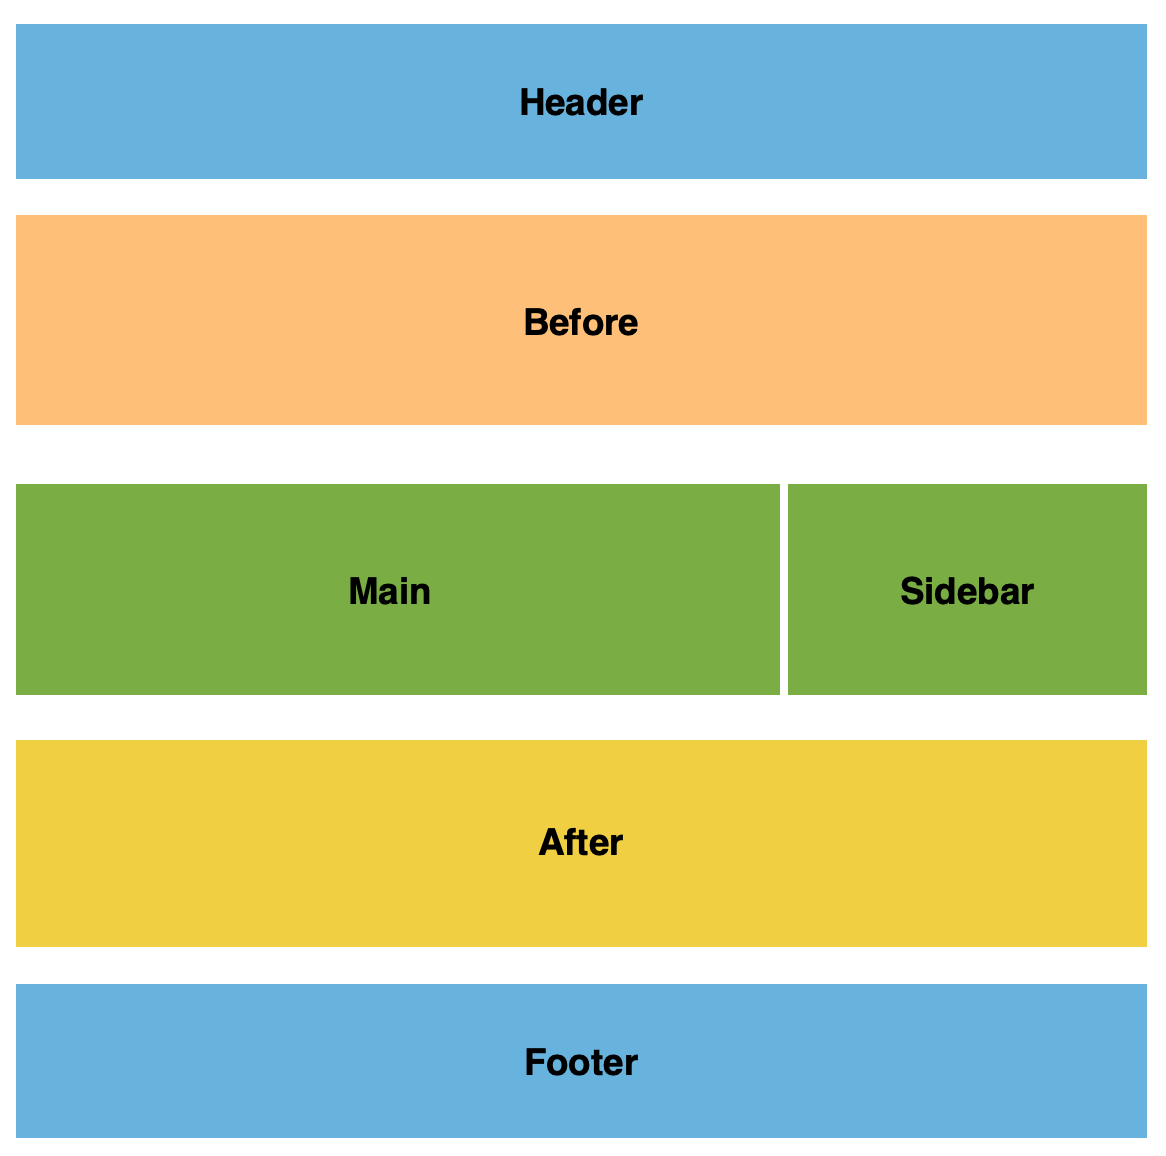
Beyond the basic schematic more detail can be added with the use of meta tags. Additionally extra html elements can be added as Before Main section, After Main section and a Sidebar section. Conceptually this is shown below.
A typical schematic with all these elements is shown below. In this example a lot more meta keywords are added. The extract keyword is used to add information that will appear when this page information is displayed in a list. Authors and categories will be added to the backend lists unless they have been specified in the Settings file (settings.txt). If no author or category (for a post) are defined the default will be used. The default category is "none". The default author is "anon" but this can be changed in the Settings file.
///META:
title={ Title 1 }:
url={ /path/to/page }:
description={ A Morfless page }:
extract={ A Morfless page - details about what it is and a summary of the content if possible }:
author={ Jim, Bob, Sue }:
category={ interesting things, other articles }:
thumbnail={ /images/thumbnail-for-page.png }:
///HEADER:
< more commands ...>
///BEFORE:
< more commands ...>
///MAIN:
< more commands ...>
///AFTER:
< more commands ...>
///SIDEBAR:
< more commands ...>
///FOOTER:
< more commands ...>
Publishing a page
To publish the page, simply upload it into the Source bucket on your site. This can be done using the AWS command line interface (AWS CLI), using the AWS GUI in the AWS Console or by using a third-party GUI that allows file transfer to your account.